A clean roof improves curb appeal and helps prevent water damage, so early detection of problems can cut repair costs. This step-by-step roof cleaning guide explains safe methods, when soft wash is the better choice, and how to weigh a weekend DIY against hiring a local pro.
Quick summary
- When to clean: do a ground-level check for black streaks, moss, or clogged gutters, and clean before shingles lift or rot.
- Best method: soft wash works for most shingles because it kills growth without blasting granules; reserve pressure for special cases.
- Cleaner choice: prefer eco-friendly, roof-safe solutions (oxygen-based or properly diluted bleach), and respect dwell times for best results.
- DIY checklist: prioritize safety, have a helper, tie off the ladder, check your warranty, photograph damage, and use gentle application tools.
- When to hire: call a pro for steep roofs, warranty concerns, or difficult access; expect transparent per-square-foot pricing and written documentation.
Roof cleaning basics: do you really need it?
Do a ground-level check for discoloration, loose granules, and debris in gutters, and note shaded or tree-covered areas that trap moisture. If conditions allow, use a ladder to inspect flashing, vents, and shingle edges while someone holds the ladder and watches from the ground. Those observations help you decide whether a targeted DIY or a professional cleaning is the safer choice.
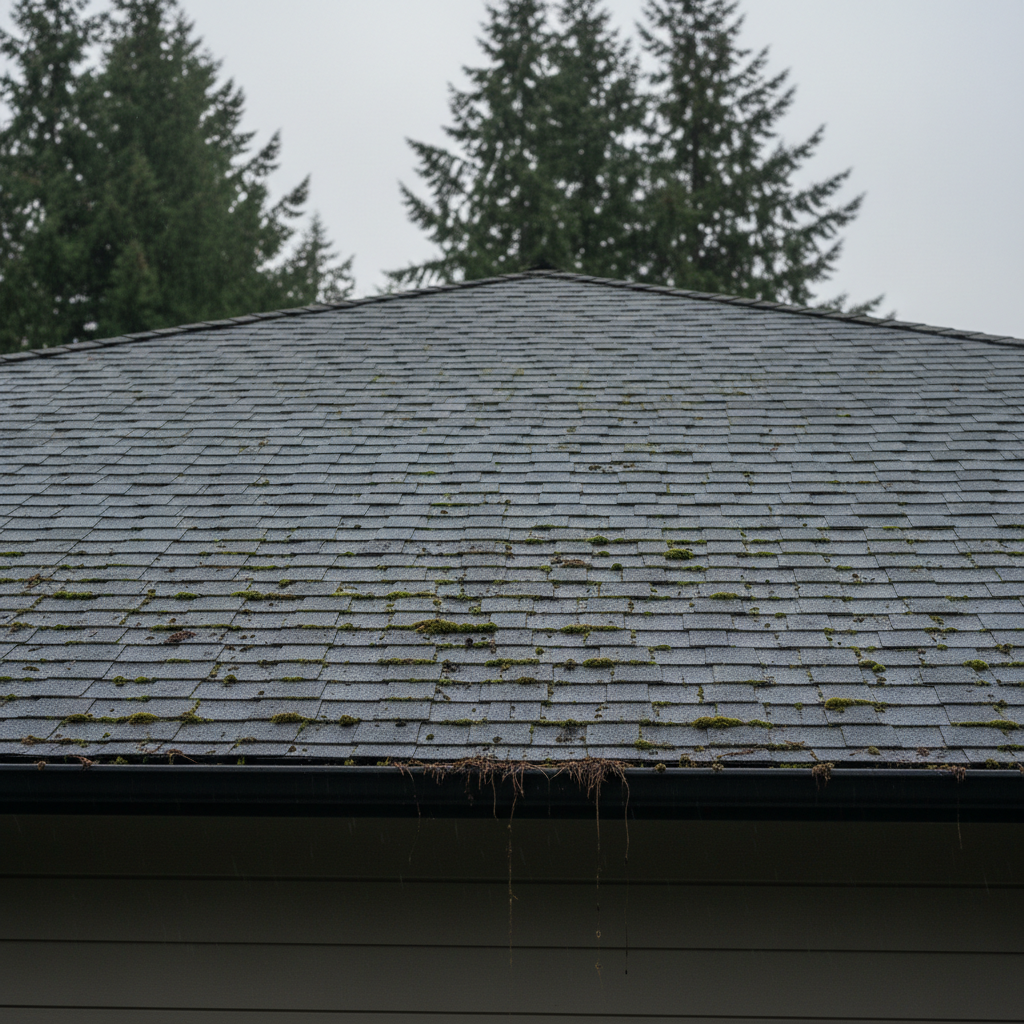
- Black streaks or dark staining across shingles
- Green patches or clumps of moss growing between shingles
- Lifting, curling, or missing shingles and recurring gutter clogs
These issues are more than cosmetic: they trap moisture, speed up deterioration, and can lower resale value. How often you clean depends on roof material, shade, and climate; in damp, shaded locations, inspect asphalt shingle and tile roofs every six to twelve months and check metal roofs every one to two years. Preventive steps—trim branches, clear gutters, and consider zinc or copper ridge strips—reduce regrowth between cleanings.
If growth returns quickly or you see widespread lifting or brittle shingles, call a professional for a safe inspection and a written estimate before attempting DIY fixes. A pro can spot hidden damage and recommend whether a soft wash, mechanical removal, or roof repair is needed.
Choose the right method: soft wash vs pressure
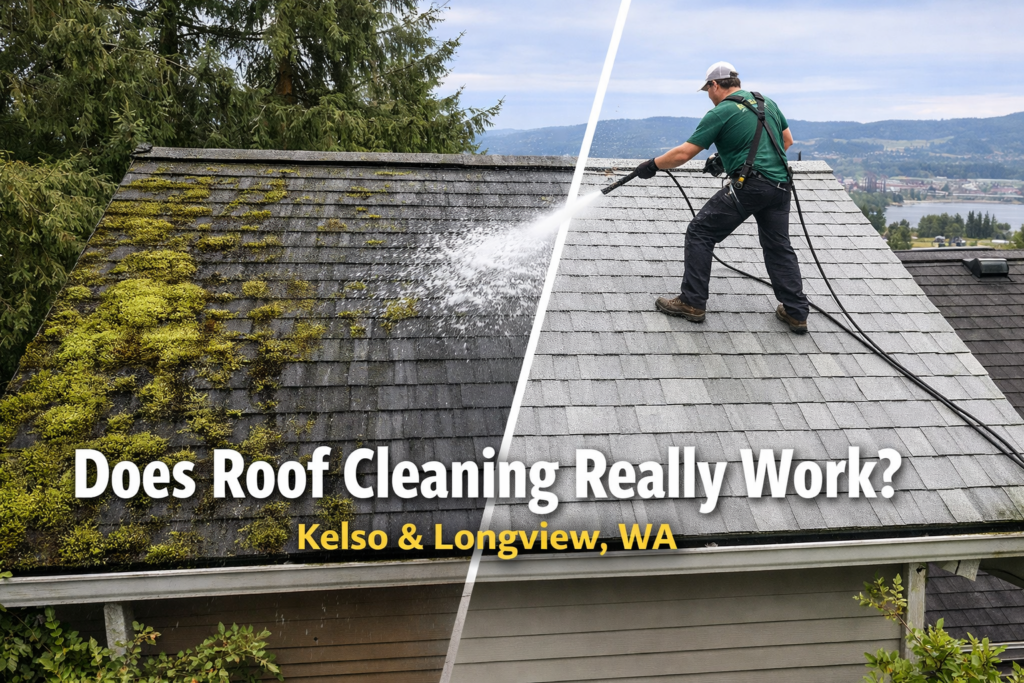
Soft washing is the gentler option for most roofs and removes growth without blasting granules. It uses low pressure, an appropriate biocide, and dwell time to break down algae, moss, and lichen so results last longer and shingle surfaces stay intact. Reserve high-pressure methods for rare cases where mechanical removal is necessary, and have trained crews handle those jobs to reduce the risk of damage. For a detailed industry comparison of soft-wash and pressure-wash approaches, see this soft-wash vs. pressure-wash comparison.
Treat each roof type differently—what works on metal may harm shingles. Use the method that matches your roof material and warranty requirements.
- Asphalt shingles (shingle roof cleaning): use low pressure, an oxygen-based or properly diluted sodium hypochlorite solution, and careful rinsing; avoid power-washing that strips granules and may void warranties. For guidance specific to asphalt roofing systems and algae prevention, consult this resource onalgae and moss prevention for asphalt roofs.
- Cedar shakes: soft wash plus light brushing for debris; avoid pressurized scraping that can split wood fibers.
- Tile roofs: use low pressure and manually remove stubborn moss; avoid walking on brittle tiles and never use high-pressure nozzles.
- Metal roofs: soft wash or mild detergent with low pressure; high pressure can bend seams and force water into fasteners.
High-pressure washing can lift shingles, push water under flashings, and lead to leaks that appear later. There are rare exceptions—thick, root-bound moss on a hard, non-shingle surface, for example—but mechanical removal should be done by trained crews using controlled tools and fall protection. When pressure is necessary, crews should reduce nozzle pressure, adjust the angle, and limit exposure to protect the roof. For a practical guide comparing both methods in field applications, review this soft-wash vs. pressure-washing guide.
Safe, eco-friendly cleaners and how to mix them
Pick cleaners that kill growth without harming shingles, plants, or metal. Oxygen-based products and diluted bleach are common choices, and some commercial low-contact formulas offer longer protection with less handling. Always follow product labels and never mix bleach with ammonia or acidic cleaners, which can produce hazardous fumes.
Oxygen bleach (sodium percarbonate) is gentle and breaks down into oxygen and water. For a one-gallon solution, dissolve about 1 cup of sodium percarbonate in a small amount of warm water to fully dissolve it, then add water to make one gallon. For stubborn black algae or lichen, up to 1/4 cup of TSP per gallon can help—follow product directions and use gloves and eye protection. Allow about 30 minutes of dwell time; results can improve over the next few days as oxygen continues to work. If you’d like a technical explanation of how oxygen bleach-based eco-roof washes work in practice, see this article on how oxygen bleach eco-roof wash works.
Household bleach (5–6% sodium hypochlorite) is effective but harsher on plants and metal; use it carefully. For heavy moss, try roughly 1 part bleach to 4 parts water, and for light staining, use about 1:9; let the solution sit 30–60 minutes and up to two hours in cool conditions before rinsing or neutralizing. Low-touch commercial products such as Wet & Forget or Spray & Forget act more slowly but can reduce repeat treatments on some roofs. Always protect nearby plants and rinse thoroughly where needed.
Protect landscaping by wetting and covering shrubs, diverting or covering gutters, and avoiding concentrated solution running across exposed metal. If runoff occurs, neutralize bleach with sodium thiosulfate (about 1 tablespoon per gallon) before it reaches planting beds, and never discharge concentrated solution to storm drains. Rinse gently and clear gutters after work to remove residual chemicals.
DIY roof cleaning: a step-by-step checklist
Start with a safety-first inspection from the ground: assess pitch, shingle condition, vents, and nearby trees. Check your roof warranty and local regulations before climbing, and plan for a helper to steady the ladder and hand tools. Bring a ladder stabilizer, non-slip shoes, gloves, eye protection, and a tether if you climb; stop and call a professional if the roof is steep, brittle, heavily covered, or your warranty forbids homeowner work. If you want a quick checklist and setup tips before you start, see our How to prepare page for more details.
- Inspect and plan: confirm pitch, condition, and access, and identify concentrated growth areas to target.
- Check warranties and regulations: read your shingle warranty and local rules; if the warranty forbids homeowner cleaning, hire a pro.
- Assemble safety gear and helpers: ladder stabilizer, helper to hold the ladder, non-slip footwear, gloves, eye protection, and a tether if used.
- Set up ladder safely: place on firm ground, use a ladder stabilizer, and secure the base; never work from a ladder alone on steep roofs.
- Prepare and label cleaners: mix solutions according to the recipes above, label containers clearly, and wear PPE when handling chemicals.
- Protect landscaping and gutters: pre-wet or cover shrubs, divert or cover gutters, and plan for neutralizing runoff if needed.
- Apply solution systematically: work in manageable sections, apply from the ridge to the eave so gravity helps, and keep the application even.
- Allow proper dwell time: follow product directions for the recommended dwell period before rinsing to maximize effectiveness.
- Rinse gently: use low pressure only, keep flow under about 500 PSI, or use a garden hose with a fan nozzle and a gentle sweep; do not pressure blast.
- Remove dead growth after drying: wait until treated growth is dry, then gently remove with a soft brush to avoid tearing shingles.
- Clear and inspect gutters: remove debris and rinse residues, and inspect flashing and shingles for new or hidden damage.
- Document and stop if needed: photograph before-and-after, keep product labels, and stop and call a professional if you find heavy flaking, brittle shingles, or structural issues.
Hiring a pro: costs, warranty issues, and what to ask
Professionals usually price roof cleaning by area. Typical soft-service work runs about $0.30 to $0.75 per square foot, so a 1,000-square-foot roof commonly falls between $300 and $750; final cost depends on access, pitch, and how entrenched the growth is. Get an on-site estimate before you commit.
- Pitch and roof steepness (safer rigging and more labor)
- Accessibility and setup time (scaffolding or lifts)
- Severity of moss, algae, or lichen (longer dwell time)
- Add-ons: gutter cleaning, flashing protection, post-cleaning inspections
Shingle warranties can be affected by cleaning methods, so ask both the manufacturer and the contractor whether specific chemicals or pressures void coverage and get that guidance in writing when possible. When you call a contractor, bring the warranty language and ask for their documented method to preserve coverage during roof cleaning. A contractor’s willingness to provide method details and runoff plans is a good sign of transparency.
Vet contractors with a short checklist: request license and liability insurance, a clear description of the low-pressure method and product names, runoff containment plans, before-and-after photos, and a written guarantee. Watch for red flags such as promises of high-pressure blasting, vague chemical lists, or claims of working without insurance. A typical professional job often includes a 30-minute inspection, low-pressure biocide application with a dwell period, a controlled rinse, plant protection, final photos, and a few hours of total work time.
Safety, environmental protections, and long-term maintenance
Put safety first: use a helper, tie off ladders, avoid working on wet or windy days, and do not attempt a steep roof without certified fall protection and training. Keep a phone nearby and mark work areas so neighbors and pets stay clear while work is underway. If you or your helper feel unsure at any step, stop and call a professional.
Protect plants and waterways by preparing before you spray: thoroughly wet or cover nearby plants, collect or divert rinse water when possible, and choose biodegradable cleaners when they are effective. Never discharge concentrated solution to storm drains. Rinse gently and remove residual cleaner from gutters and beds.
Reduce how often you need full cleanings by installing zinc or copper strips at the ridge, trimming overhanging branches for sunlight and airflow, and keeping gutters clear. Regular monitoring catches problems early and minimizes repair costs.
Quick answers to common questions homeowners ask about roof cleaning follow. They cover warranties, expected results, and pressure-washing concerns.
- Will cleaning void my warranty? Check your warranty; some manufacturers require professional methods or prohibit high-pressure washing.
- How long will the results last? Expect months to a few years, depending on shade, climate, and preventive measures.
- Can I pressure wash? High-pressure washing can damage shingles; low-pressure, detergent-based methods are safer for most roofs.
- What about follow-up care? Rinse gutters after work, inspect for loose shingles, and schedule your next inspection now.
When done correctly, roof cleaning protects your investment and prevents the slow damage that shortens roof life. You now have a safety checklist, runoff practices to protect plants and waterways, and a maintenance plan that slows regrowth so you need cleanings less often.
Finish with safer, effective roof cleaning
You can tell when roof cleaning is necessary, and for most homes, soft washing removes growth while preserving shingles. Start with the ground-and-ladder self-check in this ultimate roof cleaning guide, photograph any concentrated stains or damaged areas, and use those photos when you request a surface evaluation and a written estimate from a contractor. Prioritize safety and avoid high pressure on shingles unless a trained crew recommends it.
If you’d rather hire a local team, Prep Pros Pressure Washing serves Cowlitz County, Kelso, Longview, and surrounding areas and offers roof cleaning with on-time arrival, surface evaluation, and written estimates. Call for a surface check, a documented method to protect your warranty, and before-and-after photos you can keep. A small action today, an inspection or a quick cleaning, can prevent costly repairs later.